

- A workflow built in the Admin Console with an ID verification step and, optionally, a face liveness step. Copy its workflow ID.
- An API key from API authentication. It stays on your backend.
- An iPhone or iPad running iOS 15 or later. The camera doesn’t work in the iOS Simulator.
1
Add the SDK
In Xcode, choose File > Add Package Dependencies…, enter
https://github.com/Deep-Identity-Inc/deepidv-sdk-swift, and add the DeepIDV library to your app. Details: Installation.2
Declare camera access
Add
NSCameraUsageDescription to your app’s Info.plist:3
Create the session on your backend
When a user starts verification, your backend creates a workflow session and returns its ID to the app. Remember which user it belongs to.
Node.js
4
Proxy the SDK's requests
The SDK calls the deepidv API for the session it runs. Point it at your backend, which checks the user and adds your API key. Copy the proxy from Proxy mode.
5
Present the workflow
Create one client, pointed at your proxy, and present The view runs every step in the workflow, shows retries when a photo can’t be used, and ends on a short thank-you screen before
DeepIDVWorkflowView with the session ID.onResult fires.6
Receive the decision
Subscribe to the
session.status.verified and session.status.rejected webhooks, or read the session with Retrieve session. Grant access from there, not from onResult. See Results and the decision.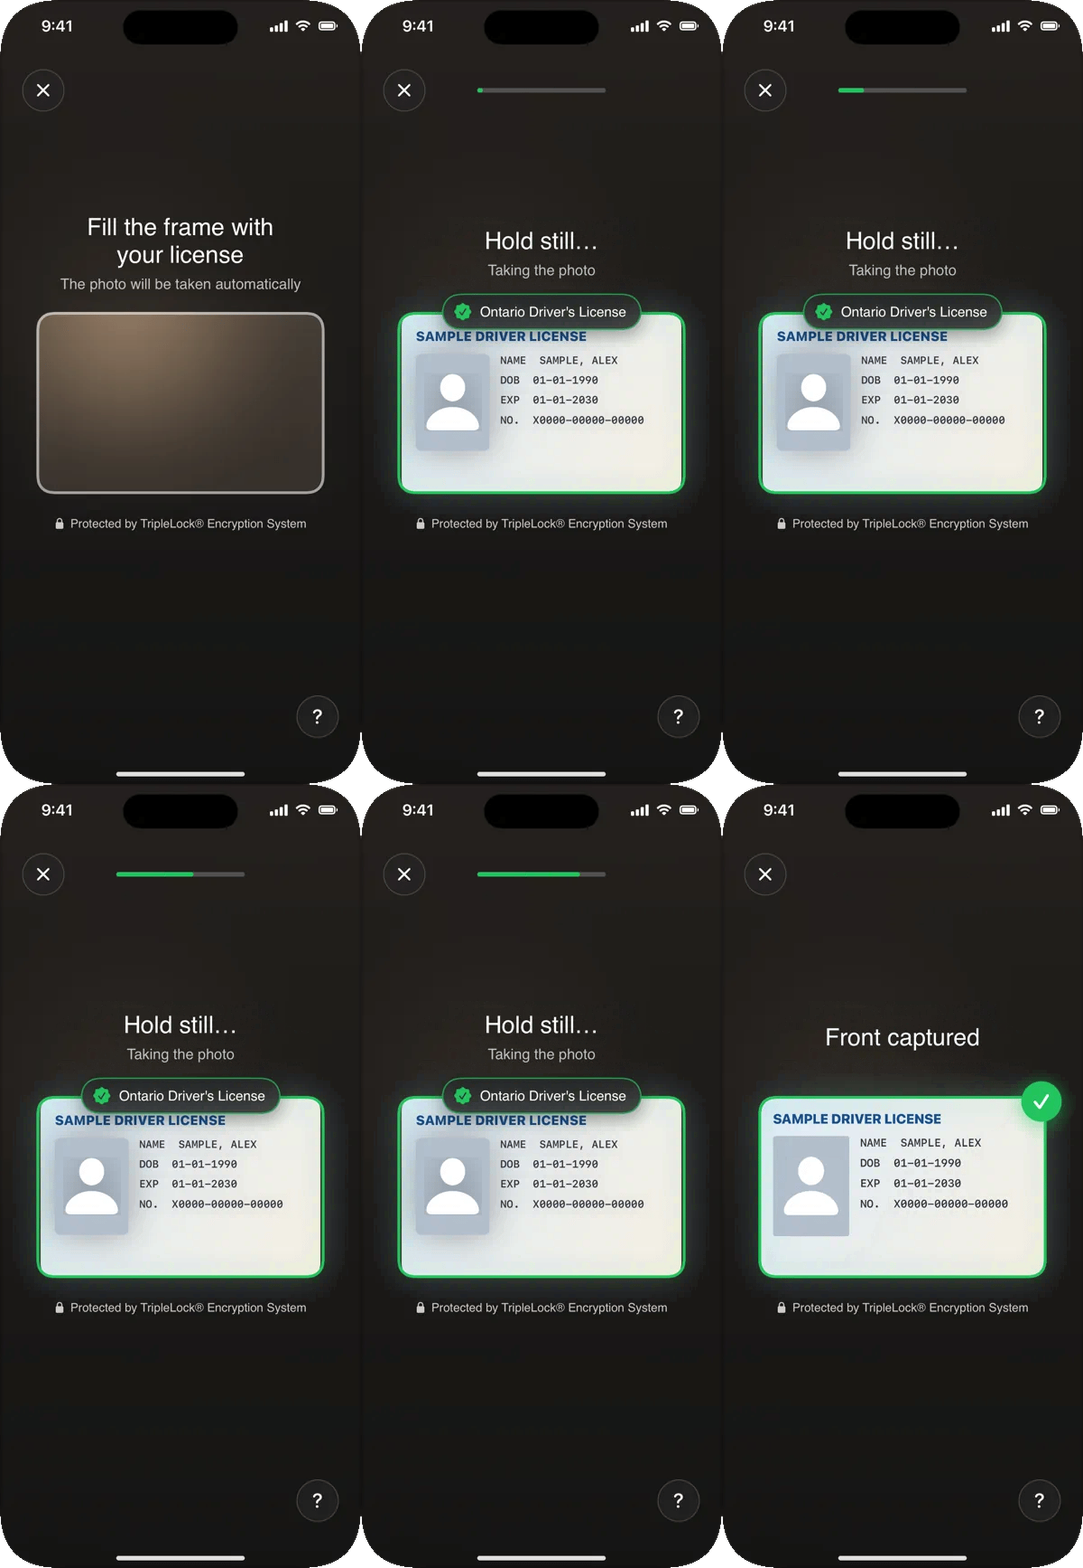
What your user sees: the document camera, then the closing screen.
Next steps
Run a workflow
The three ways to start a run, and what each step shows.
Document capture
Every capture screen and what triggers it.
Branding
Your colors and fonts on every screen.
Troubleshooting
Fixes for the common problems.